

If you have a bike reflector like the one in the images below, you can download and 3D print this holder to turn it into a hidden bike tracker for your Apple AirTag. It’s a great way of hiding an AirTag on a bike — less obvious than under the seat, and one more layer of protection for stolen bike recovery if your bike ever goes missing.
Bike theft is a growing problem in Australian cities, especially in Brisbane and the Gold Coast where cycling infrastructure has expanded rapidly. A visible AirTag under your saddle makes it an easy target for thieves who know how to remove it. By hiding it inside a reflector housing with this custom mount, your tracker becomes much harder to find and remove.
This design works by slipping inside your existing reflector shell — no need to modify the reflector itself. The top component glues to the interior of the housing, creating a retention clip that holds the AirTag snugly in place. A small slot allows you to press the AirTag into position and lock it securely.
This design has been tested with standard US-style bicycle reflectors — if your reflector housing is a similar size (roughly 60mm x 30mm), this should fit perfectly. Check the product images to verify compatibility before printing.
3D Printing & Assembly Instructions
To remove the mount from your reflector light, use a flat screwdriver to lift the end while sliding it out from its guide.
Once you print both STL files, the top component will need to be glued in place. I used Gorilla Glue — it’s easy to work with and bonds PLA well. Make sure you clean your surfaces with isopropyl alcohol first, then make sure both surfaces are pressed together until the glue sets. A flat plastic cap works as a good spacer while pressing components together.
The AirTag retention clip inside the mount holds it snugly in place. Even when you’re riding over bumps or through puddles, the AirTag stays locked inside the reflector housing where no thief is going to look.
Here are my print settings. As you know 3D printing is largely experimental so your result may vary from mine. Experiment with different infill percentages if needed — 20% was good enough for the retention clip to grip securely.
Pro tip: Print two copies of the mount so you can use one on your commute bike and one on a secondary or backup bike. If anything happens to one, you’ll still have tracking on the other.
If you’d like to discuss any questions about the design, print settings, or mounting — feel free to reach out via the Candco contact page. We also have a range of 3D printed products available for bike safety and home automation in our online shop.
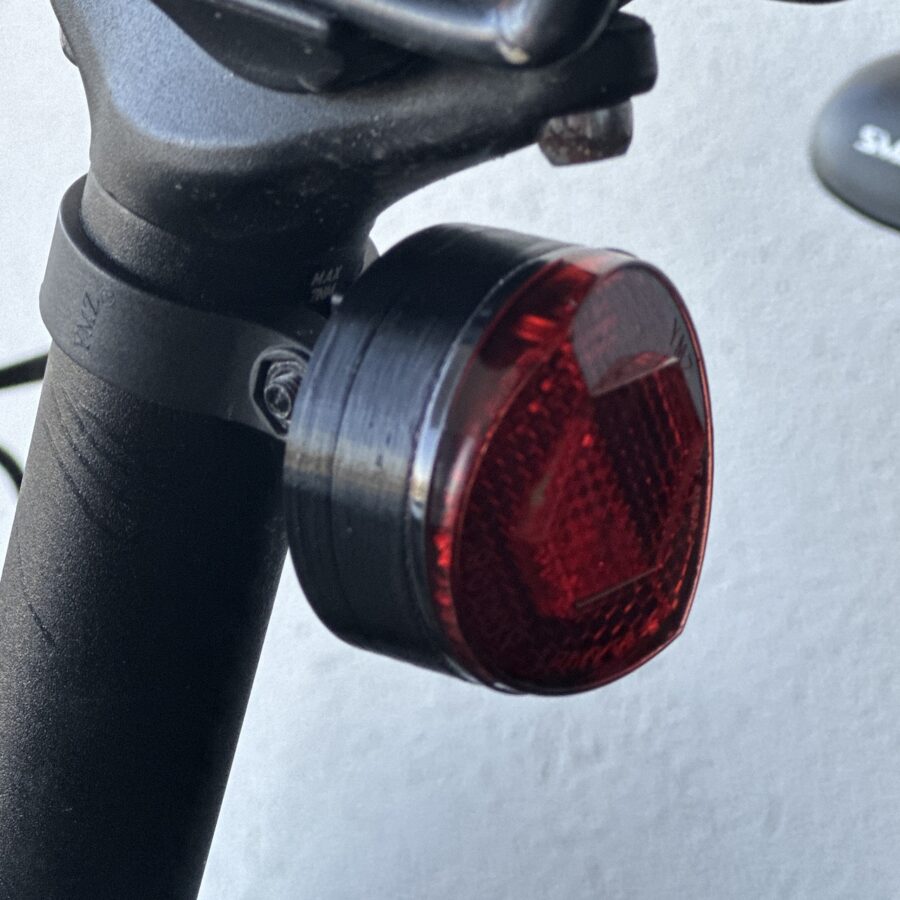
A neat place to hide your Apple AirTag. Both parts are threaded, so that its easy to unscrew one part of the holder to access the AirTag and replace the batteries.
Helps track your bike if taken. When assembled the reflector looks like a regular light.
NOTE: The reflector and the seat post mount are not part of the download. It is assumed that you already have the reflect as pictured.
Why isn’t this design free to download? You are supporting my significant effort in designing this part, and making it easy to 3D print, so you don’t have to. This is a downloadable part, not a physical object, that’s posted.